I've been meaning to do this for awhile, and was inspired by the relative ease of the 360 firmware hack. While browsing around the dark seedy expanses of internet modchip vendors, I happened across a very cheap ($15!) chip from the Duo team of PS1/2 fame. It isn't so much a modchip as a live DVD firmware replacement, very similar to the method used to comprimise the 360. Add to that the very high quality offerings of late in the arena of case shell replacements to allow use of full size DVD's, and we're off and running.
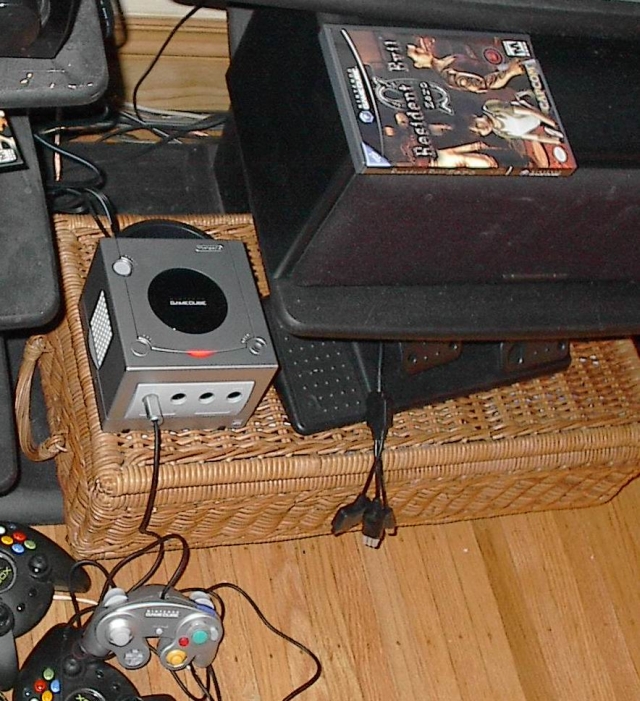
I forgot to take a before pic, but here's one from when we first got the little bastard for reference:
First things first, order yo shit. Gamecubes (and all systems dating back to the 8 bit NES) use propietary screws on the case to keep mouthbreathers like me out of the yummy insides. It's called a GameBit and while you can melt down the end of BIC pens and maybe coax the screws out, that method is definitely ghetto fabulous. I plunked down the $6.99 for just the bit, was too cheap to get a full screwdriver for 2 bucks more. Almost thought they forgot it too - they just threw it in the box amongst the peanuts. Here she is:
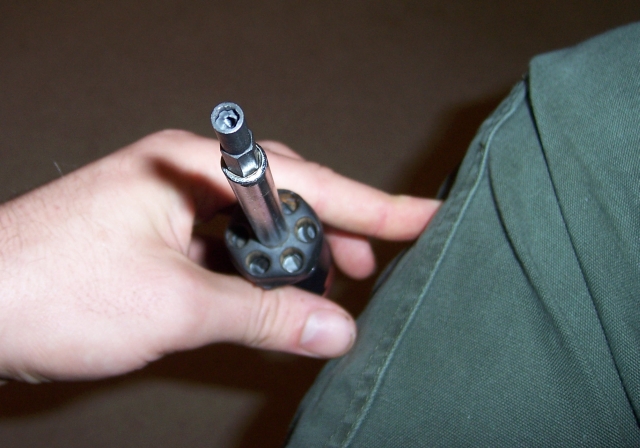
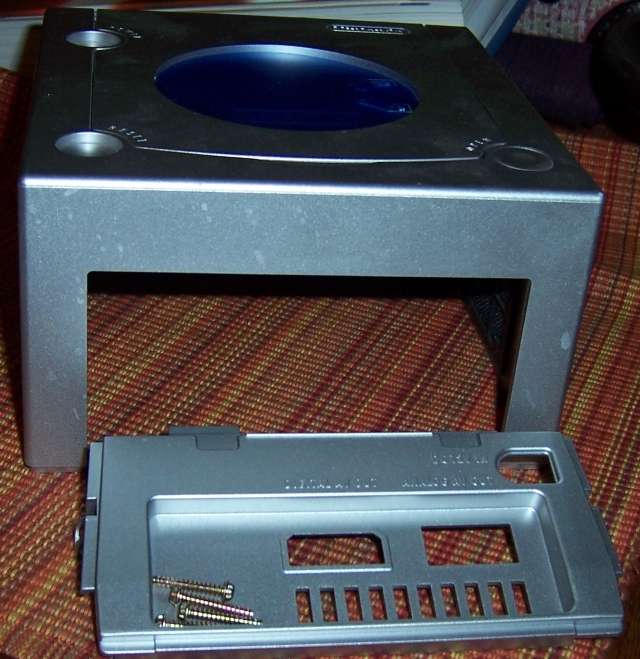
All that for only 4 screws. Ah well, it would have been 8 pens wasted, 4 to open and 4 to close it back up.. and that's if all went according to plan. Here you can see the top shell and back plate removed. I also already removed the top jewel - the case came with a "Viper" jewel and a "NYE 2006" jewel that looked like someone ate a box of Crayola crayons and puked all over the top of the cube. So, I just used the stock jewel. Boring, maybe? I think it looks boss with the regular old nintendo logo.
Here's the unmolested guts of said Cube. Nintendo sure knows how to make a system, I'll tell you what. This is no XBox1... hardly a few inches of wasted space inside.

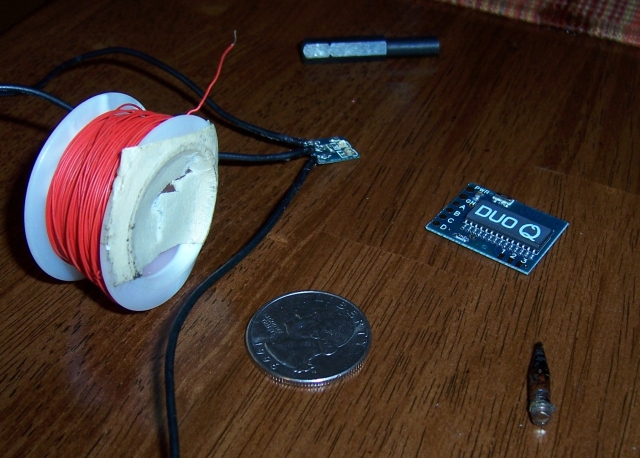
Clockwise from the top: Gamebit, the chip in question, an old nasty soldering iron tip that refused to work without being swapped for a shiny new one, a quarter for size reference, a roll of 30ga wire used for the chip connections, and the optional LED board with monstorous looking black cables for the LED signals/power. I almost put this off til tomorrow because all I could find was that huge cable and was wrestling with trying to get it to stick - finally I tore apart the closet and found that tiny wire.
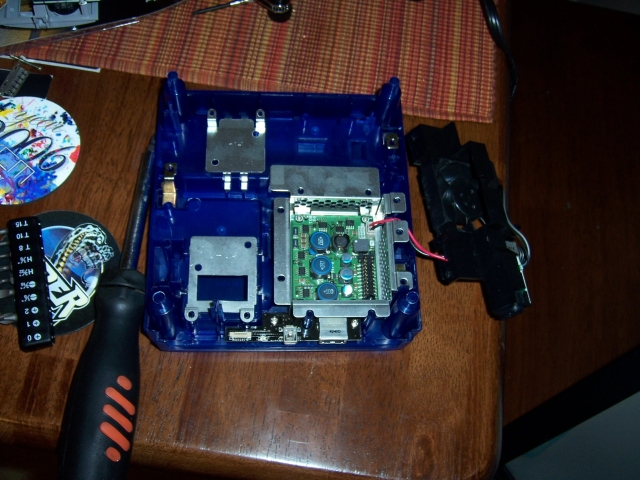
After mucking around with the thick black cable for a while, I got frustrated and decided to start moving everything over into the blue case. This is the ground shields and the little tiny power supply with high quality Nidec fan. I didn't ride the lightning this time! Eh, I've been JOLTed enough times in my life. The little black board you see on the back is an interface board if you had a Viper chip - there's a USB port and some other port so you could interface with the chip directly. Cool stuff, but case+chip+gamebit ran me about the same as one viper chip, so there you go.
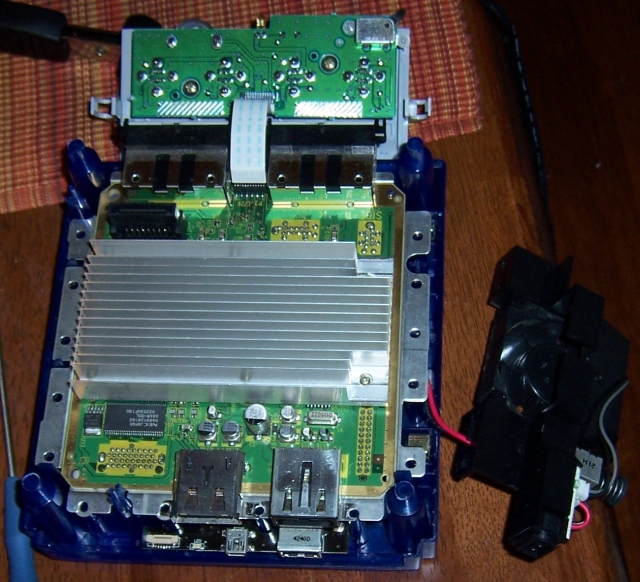
Here's with the mainboard installed; nice big beefy heatsink.
After taking a breather from soldering the megacables and taking a quick slug of scotch for good luck, it was time for the fun part (yeah right). At least it was only 6 wires. Didn't mess anything up and of course tested the work with a multimeter. (should also mention here a digital multimeter is required to adjust the pot - not that kind of pot - it's supposed to read between 170-200 ohms. Some of them come set at 600 or more from the factory. For some reason, mine was @ 190 so I didn't even bother to adjust it. Now's the time to check it, at least though.)
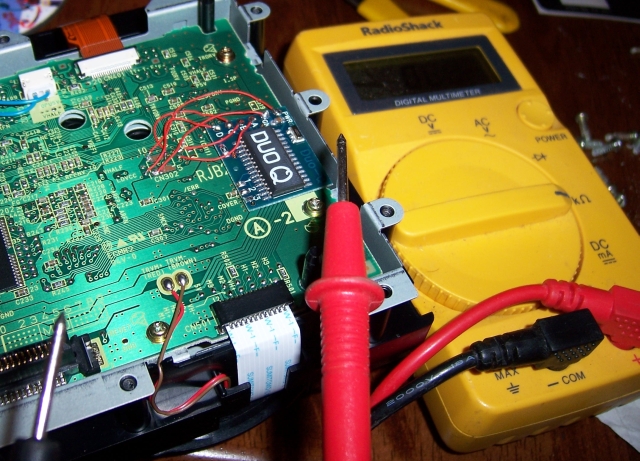
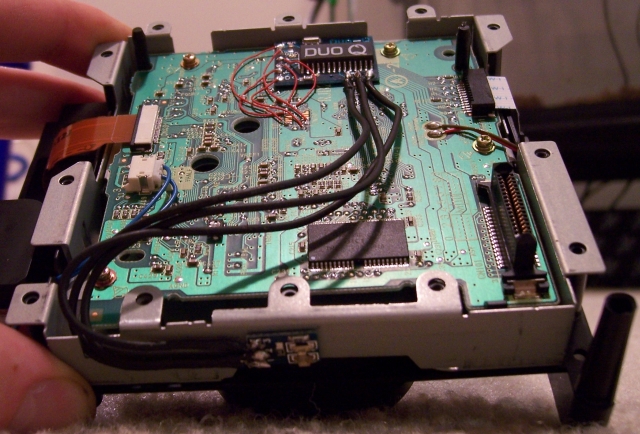
Here's a closeup of the chip installed, I don't know why I'm submitting a sample of my soldering work to the scrutiny of the entire internet but here goes:
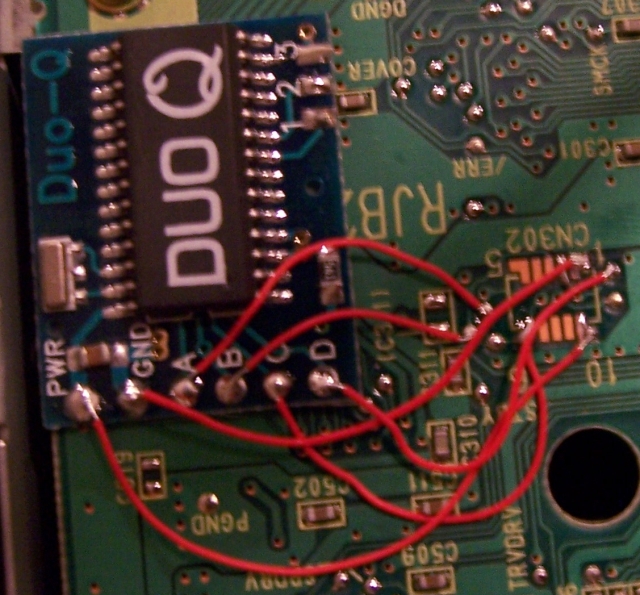
Attach the 3 bastard led cables, affix the chip, and take a pretty picture. Both chip and led board had double sided tape on the back. A nice touch especially considering my $50+ xbox chip didn't come with it and we had to use hot glue.
Speaking of hot glue, what a wonderful substance. A little dab here and a little dab there to make sure nothing's putting pressure on your new solder points, and a coating of electrical tape - Don't leave home without it!
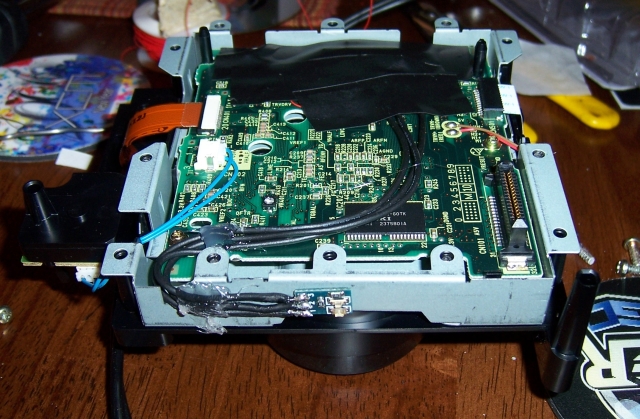
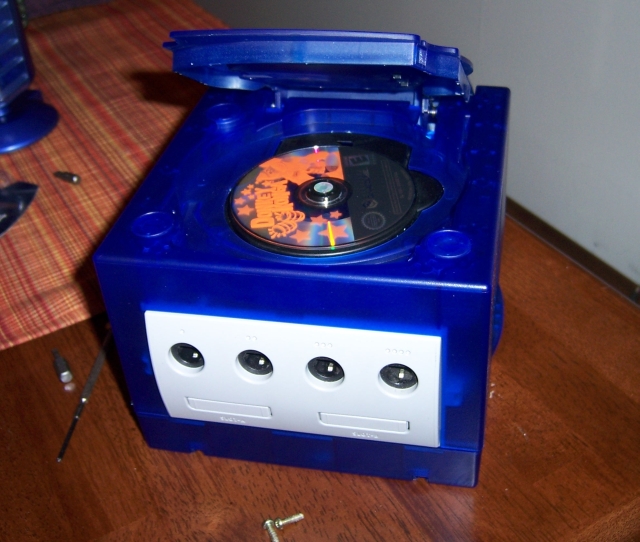
Now, just reverse disassembly and you've got yourself a sexy hacked cube! Mine is missing 2 screws - doh. Think it'll live. Notice the extra space around the gamecube disc, just enough space for a full size dvd!
A nice collage of pics showing the way the LED looks while it's booting (the dim pics are actually orange before it starts working its magic)

My beautiful 5 year old daughter Noel was my little helper through some of this process, so she was just as excited as me to play Luigi's mansion. Now we just have to get the other bongo games.
As you can see, she likes playing bongos ;)
